通过 Github API V3 使用 Fetch
介绍
GitHub 是软件开发过程中非常重要的平台,无论是用于开源软件、私有工具、持续集成还是其许多其他用例。在本指南中,您将学习如何将 fetch API 与 GitHub 应用程序编程接口一起使用。
了解 API
在向任何 API 发出请求之前,您需要弄清楚提供商公开了哪些端点。在这种情况下,GitHub 提供了用于搜索、存储库、项目、markdown、用户等的端点。在 Github 的官方文档中了解更多信息。在本指南中,您将仅使用/users端点。对 API 的所有请求都应该发送到根端点(https://api.github.com)。
用户端点
要获取随机用户列表,您必须向/user端点发出请求;要获取特定用户的详细信息,您必须向/user/{username}端点发出请求。您可以在终端中使用 curl 快速尝试以下命令来查看结果。
用户端点
      curl \
-H "Accept: application/vnd.github.v3+json" \
https://api.github.com/user
特定用户
      curl \
-H "Accept: application/vnd.github.v3+json" \
https://api.github.com/user/{YOUR_GITHUB_USERNAME}
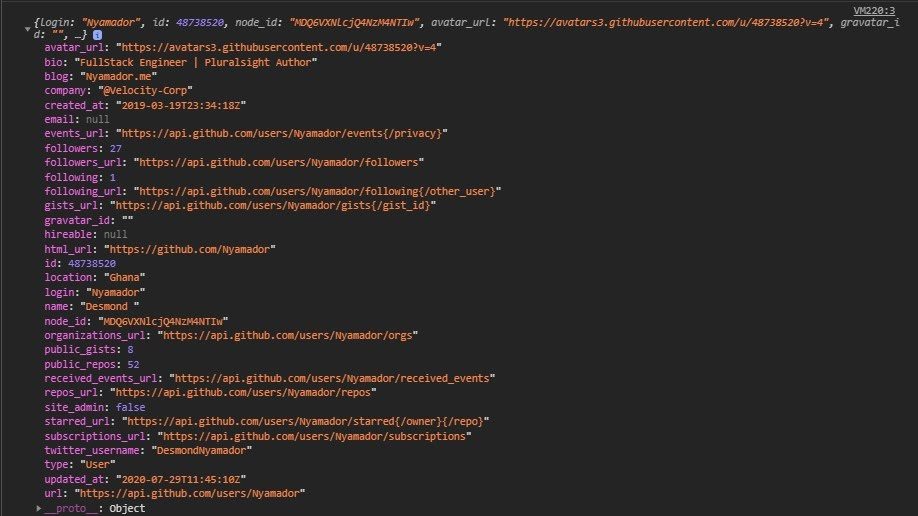
如果您向端点发出用户名的请求,您的响应应该如下所示。
请注意,响应的结构可能与下面显示的并不完全相同。因此,如果有任何变化,您应始终参考文档。
      {
login: "Nyamador",
id: 48738520,
node_id: "MDQ6VXNlcjQ4NzM4NTIw",
avatar_url: "https://avatars3.githubusercontent.com/u/48738520?v=4",
gravatar_id: "",
url: "https://api.github.com/users/Nyamador",
html_url: "https://github.com/Nyamador",
followers_url: "https://api.github.com/users/Nyamador/followers",
following_url: "https://api.github.com/users/Nyamador/following{/other_user}",
gists_url: "https://api.github.com/users/Nyamador/gists{/gist_id}",
starred_url: "https://api.github.com/users/Nyamador/starred{/owner}{/repo}",
subscriptions_url: "https://api.github.com/users/Nyamador/subscriptions",
organizations_url: "https://api.github.com/users/Nyamador/orgs",
repos_url: "https://api.github.com/users/Nyamador/repos",
events_url: "https://api.github.com/users/Nyamador/events{/privacy}",
received_events_url: "https://api.github.com/users/Nyamador/received_events",
type: "User",
site_admin: false,
name: "Desmond ",
company: "@Velocity-Corp",
blog: "Nyamador.me",
location: "Ghana",
email: null,
hireable: null,
bio: "FullStack Engineer | Pluralsight Author",
twitter_username: "DesmondNyamador",
public_repos: 52,
public_gists: 8,
followers: 27,
following: 1,
created_at: "2019-03-19T23:34:18Z",
updated_at: "2020-07-29T11:45:10Z"
}
Fetch 简介
fetch API 提供了一个 JavaScript 接口,用于访问和处理网络上的请求和响应。它通过浏览器中的全局window.fetch()方法提供。
使用 Fetch
现在您已经清楚地了解了您的请求从哪里发出以及您将获取的数据的结构,您现在可以轻松地使用您的代码向 API 发出请求。
获取请求如下所示:
      fetch(URL,  init:{method: 'GET', headers:{},  body})
    .then(response => response.json())
		.then(data => console.log(data))
		.catch(error => console.log(error));
// URL - Url of the resource
// Headers - Headers for the request( Content-Type, ...)
// Body - Request content
// Init - Contains request body and headers and other configurations such as the request method.
因为fetch()返回一个承诺,所以您可以根据需要链接任意数量的.then()和一个 catch 方法来优雅地处理失败请求中抛出的错误。
应用到目前为止的所有知识,您可以使用以下代码向 GitHub /users端点发出请求。
      fetch('https://api.github.com/users/{YOUR_USERNAME}')
		.then(response => response.json()) //Converting the response to a JSON object
		.then( data => document.body.append())
		.catch( error => console.error(error));
清理
Github API 文档建议在请求中添加一个值为application/vnd/github.v3+json 的accept 标头。只需将 Accept 标头添加到 init 对象即可。您可以继续将内容附加到 DOM,如下所示。
      <!DOCTYPE html>
 <html>
  <head>
</head>

    <body>
         <div id="root">
       </div>
   </body>

 </html>
      fetch('https://api.github.com/users/{YOUR_USERNAME}', {
                 headers: {
                      'Accept' : 'application/vnd.github.v3+json'
                  }})
		.then(response => response.json()) //Converting the response to a JSON object
		.then( data => {
                    const root = document.querySelector('#root');
                    root.innerHTML = `
                      <a href=`${data.html_url}`>Name: `${data.name}`</a>
                     <p>Followers : `${data/followers}`</p>
                  `
                })
		.catch( error => console.error(error));
结论
就这样结束了!在本指南中,您学习了如何使用 Javascript fetch API 向 GitHub API 发出请求。有了这些知识,您就可以开始向任何 API 🚀 发出请求。有关如何使用 fetch API 的更多信息,请阅读Mozilla 开发者网络文档。也可以在 Twitter 上关注我@DesmondNyamador。
免责声明:本内容来源于第三方作者授权、网友推荐或互联网整理,旨在为广大用户提供学习与参考之用。所有文本和图片版权归原创网站或作者本人所有,其观点并不代表本站立场。如有任何版权侵犯或转载不当之情况,请与我们取得联系,我们将尽快进行相关处理与修改。感谢您的理解与支持!


请先 登录后发表评论 ~